The Harmony 650 is an activity-based infrared universal remote, simplifying home entertainment control. Its user manual guides setup and device synchronization for seamless operation.
This remote remembers device states and previous inputs, ensuring a synchronized and user-friendly experience, as detailed in version 1.0 of the manual.
What is the Harmony 650?
The Logitech Harmony 650 is a universal remote control designed to consolidate multiple remotes into one, streamlining your home entertainment experience. As outlined in the user manual (version 1.0), it’s an activity-based remote, meaning you set up “Activities” – like “Watch a Movie” – that control multiple devices with a single touch.
Unlike traditional remotes, the Harmony 650 remembers the status of your devices (on/off) and their last used inputs. This eliminates the need to manually power on each component and select the correct source. The manual emphasizes that maintaining this device state information is crucial for seamless operation. It utilizes infrared (IR) technology to communicate with your devices, and the included USB cable facilitates initial setup and software connection.
Key Features and Benefits
The Harmony 650, as detailed in its user manual, boasts several key features. Its primary benefit is simplifying control of your home theater. Users can create customized “Activities” to manage multiple devices simultaneously. The remote’s ability to remember device states – power and input selections – eliminates repetitive steps.
The manual highlights the ease of setup via a USB connection to your computer and the accompanying Harmony software. Auto-discovery features further simplify adding devices to your system. While primarily IR-based, the remote offers a user-friendly interface and a clear display for navigating settings and activities. It’s a cost-effective solution for centralizing entertainment control.
Setting Up Your Harmony 650
Setup involves connecting the Harmony 650 to your computer using the provided USB cable, as outlined in the user manual, for software installation.
Unboxing and Included Components
Upon opening the box, you should find the Logitech Harmony 650 remote control itself, designed for intuitive home entertainment management. A crucial component is the USB cable, essential for the initial setup process and connecting to your computer.
The package also includes a comprehensive user manual, available in multiple languages (version 1.0 is referenced), providing step-by-step instructions for configuration and troubleshooting. While specific battery information isn’t explicitly detailed in the provided snippets, standard AA batteries are typically required for operation.
Ensure all listed items are present before proceeding, as these are fundamental for a successful setup and optimal performance of your Harmony 650 remote.
Connecting to Your Computer via USB
To begin setup, the Harmony 650 requires a connection to your computer using the provided USB cable. Locate the fine end of the cable and carefully insert it into the USB port on the remote control itself.
Next, connect the other end of the USB cable to an available USB port on your computer. This establishes a communication link necessary for installing the Harmony software and configuring your remote.
The user manual (version 1.0) explicitly highlights this step as the initial action for setting up the remote. Ensure a secure connection for reliable data transfer during the software installation process.
Downloading and Installing the Harmony Software
After physically connecting your Harmony 650 to your computer via USB, the next crucial step is downloading and installing the necessary Harmony software. This software is essential for configuring the remote, adding devices, and creating personalized activities.
The user manual (version 1.0) directs users to Logitech’s website to obtain the latest software version. Follow the on-screen prompts during installation, ensuring you accept any required license agreements.
A successful installation will enable you to synchronize the remote with your devices and unlock its full potential for streamlined home entertainment control.

Adding Devices to Your Harmony 650
The Harmony 650 supports numerous devices; adding them involves manual entry or utilizing the auto-discovery feature through the Harmony software for easy setup.
Device Compatibility
The Logitech Harmony 650 boasts extensive device compatibility, supporting a wide range of audio, video, and computer peripherals. The remote’s database includes codes for numerous brands and models, ensuring broad functionality.
However, compatibility isn’t universal. Older or obscure devices might lack pre-programmed support, necessitating manual code entry. The Harmony software provides access to a vast online database, continually updated with new device codes.
Users can also contribute codes, expanding the remote’s reach. Checking the Logitech support website or the Harmony companion app before purchase confirms specific device compatibility, preventing potential setup issues.
Adding Devices Manually
When auto-discovery fails, the Harmony 650 allows manual device addition. This involves accessing the device library within the Harmony software and searching by brand and model number. If a precise match isn’t found, users can explore code-based entry.
The software presents a list of codes for the selected brand; testing each code is crucial until the remote correctly controls the device. This process requires patience, as finding the correct code can be iterative.
Detailed instructions within the user manual guide users through this process, ensuring successful manual device integration even for unsupported models.
Using the Auto-Discovery Feature
The Harmony 650 simplifies device setup with its auto-discovery feature. Connecting the remote to your computer via USB initiates this process within the Harmony software. The software then prompts you to power on each device sequentially.
The remote emits signals, attempting to identify each device based on its response. This method streamlines setup, eliminating the need for manual code entry in many cases. The user manual details each step, ensuring a smooth experience.
Successful auto-discovery establishes communication, allowing the Harmony 650 to control your entertainment system efficiently.

Creating and Customizing Activities
Activities on the Harmony 650 combine multiple devices into one command, simplifying entertainment. The user manual guides creating and tailoring these activities to your preferences.
Understanding Activities
Activities are at the heart of the Logitech Harmony 650 experience, representing real-world entertainment scenarios like “Watch a Movie” or “Listen to Music”. Instead of juggling multiple remotes and commands, an Activity consolidates everything into a single touch.
The Harmony 650’s user manual explains that each Activity defines a sequence of actions across your connected devices. This includes powering devices on/off, selecting the correct input on your TV, and setting the appropriate volume level on your receiver.
Essentially, Activities eliminate the complexity of managing a home theater system, offering a streamlined and intuitive control experience. The manual emphasizes customizing these activities to perfectly match your setup and preferences.
Creating a New Activity
To create a new Activity with your Logitech Harmony 650, the user manual directs you to begin within the Harmony software on your computer. You’ll first name the Activity, reflecting its purpose – for example, “Gaming Night” or “Morning News”.
Next, the software prompts you to select the devices involved in that Activity. The manual stresses ensuring all necessary devices are added to your Harmony account beforehand.
Following device selection, you define the startup sequence – the order in which devices power on and inputs are selected. The software guides you through each step, simplifying the process.
Customizing Activity Steps
Customizing Activity steps within the Harmony software allows for a truly personalized experience; The user manual explains how to modify the device sequence, adding or removing actions as needed. You can adjust power-on delays, ensuring devices synchronize correctly.
Furthermore, the manual details how to incorporate commands beyond simple power and input selection. Volume adjustments, channel presets, or even macro sequences can be integrated into each Activity step.
Precise control is emphasized; test each step thoroughly to guarantee seamless operation. The software provides a simulation mode for verifying your customized Activity before saving.
Troubleshooting Common Issues
The Harmony 650 user manual addresses issues like unresponsive remotes, device control failures, and software connection problems, offering solutions for smooth operation.
Resolving synchronization loss is key, as the remote relies on knowing device states for optimal performance.
Remote Not Responding
If your Harmony 650 isn’t responding, the user manual suggests several troubleshooting steps. First, ensure fresh batteries are installed correctly. A simple battery replacement often resolves the issue. Next, try restarting the remote by removing and reinserting the batteries.
If the problem persists, attempt a factory reset, though this will erase your current settings. The manual details the reset procedure. Check for obstructions between the remote and your devices, as infrared signals require a clear line of sight. Finally, verify the remote is in the correct mode for the device you’re trying to control.
Consult the manual for specific button combinations to initiate these processes.
Device Not Controlled
When a device isn’t responding to your Harmony 650, the user manual recommends verifying device compatibility. Ensure the device is listed as supported within the Harmony software. If compatible, double-check the IR blaster is correctly positioned and has a clear line of sight to the device.
The manual emphasizes the importance of accurate device setup. Confirm the correct device type and manufacturer were selected during configuration. Try re-syncing the remote with the device, allowing it to relearn the necessary commands. If issues continue, consult the online support resources or the manual’s troubleshooting section.
Software Connection Problems
If the Harmony software fails to connect to your 650 remote, the user manual suggests first checking the USB cable connection. Ensure it’s securely plugged into both the remote and your computer. Try a different USB port on your computer, as some ports may have limited power.
The manual also advises verifying the Harmony software is the latest version. Outdated software can cause compatibility issues. Temporarily disable any firewall or antivirus software that might be blocking the connection. If problems persist, reinstalling the Harmony software, following the manual’s instructions, may resolve the issue.

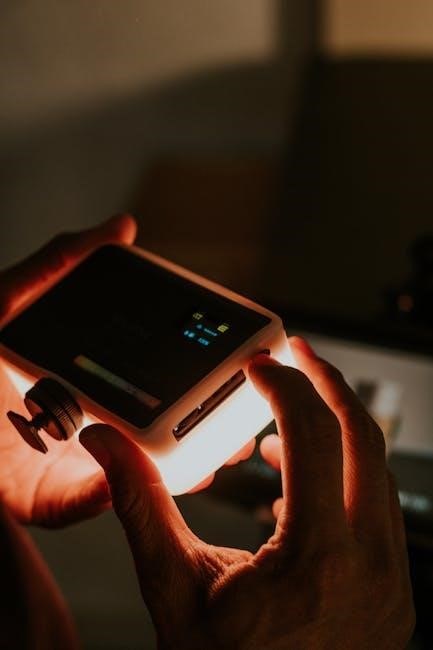
Understanding the Harmony 650 Display
The Harmony 650 display shows indicators and symbols for easy navigation. The user manual details how to adjust settings and interpret the screen’s information.
Display Indicators and Symbols
The Harmony 650’s display utilizes various indicators and symbols to communicate its status and functionality. Understanding these is crucial for effective operation, as outlined in the user manual. The display initiates tutorials, prompting users to ensure all connected devices are powered off before beginning setup.
Symbols indicate battery levels, signal transmission, and activity progress. The manual explains how to interpret these visual cues, allowing for quick troubleshooting. Familiarizing yourself with these indicators streamlines the user experience, enabling efficient control of your home entertainment system. The display guides you through actions on your entertainment system.
Navigating the Menu
The Harmony 650’s menu is accessed via dedicated buttons on the remote, allowing users to customize settings and manage devices. The user manual details the menu structure, explaining each option’s function. Users can scroll through menu items using the directional buttons, selecting options with the ‘OK’ or ‘Enter’ button.
The menu provides access to device lists, activity settings, and system preferences. The manual emphasizes the importance of exploring the menu to fully utilize the remote’s capabilities. It details how to adjust display settings and personalize the user experience, ensuring optimal control over your home entertainment setup.
Adjusting Display Settings
The Harmony 650’s display offers customizable settings to enhance visibility and user preference. The user manual guides users through adjusting brightness and contrast levels for optimal viewing in various lighting conditions. Access these settings through the main menu, navigating to the ‘Display’ or ‘Preferences’ section.
Users can also modify the display timeout duration, controlling how long the backlight remains active after inactivity. The manual details how to select preferred display indicators and symbols. These adjustments personalize the remote’s interface, ensuring comfortable and efficient operation. Experimenting with these settings optimizes the viewing experience.
Maintaining Your Harmony 650
Regular maintenance ensures optimal performance. Replace batteries when the display indicates low power, clean the remote with a soft cloth, and check for firmware updates via the software.
Battery Replacement
The Harmony 650 operates on standard batteries, typically AA size, though the exact type may vary. When the remote’s display indicates low battery power, or if responsiveness diminishes, replacement is necessary. Locate the battery compartment, usually on the back of the remote, and carefully open it.
Remove the old batteries, noting the correct polarity (+ and -) as indicated inside the compartment. Insert fresh batteries, ensuring proper alignment. Close the battery compartment securely. After replacing the batteries, you may need to re-sync the remote with the Harmony hub or software to restore full functionality and ensure accurate device control.
Cleaning the Remote
Maintaining your Harmony 650 involves regular cleaning to ensure optimal performance and longevity. Before cleaning, always remove the batteries to prevent accidental operation or damage. Use a soft, dry cloth to wipe down the remote’s exterior, removing dust and fingerprints.
For stubborn marks, lightly dampen the cloth with water, but avoid getting any liquid inside the remote. Do not use abrasive cleaners, solvents, or harsh chemicals, as these can damage the surface or internal components. Pay attention to cleaning around the buttons and display area, ensuring they remain free from debris.
Firmware Updates
Keeping your Harmony 650’s firmware up-to-date is crucial for optimal performance and compatibility. Logitech regularly releases firmware updates that address bugs, improve device support, and enhance functionality. These updates are typically installed through the Harmony software on your computer.
Connect your remote via USB, and the software will check for available updates. Follow the on-screen instructions to download and install the latest firmware. Do not disconnect the remote during the update process, as this could cause damage. Regularly checking for updates ensures your Harmony 650 operates smoothly and efficiently.

Advanced Features
The Harmony 650 supports macros for complex commands and, if equipped, an RF blaster. Integration with smart home devices expands control possibilities, as outlined in the manual.
Using Macros
Macros on the Harmony 650 allow users to string together multiple commands into a single action, streamlining complex operations. The user manual details how to create these customized sequences through the Harmony software.
You can program a macro to, for example, turn on your TV, receiver, and Blu-ray player, then switch the TV to the correct input – all with one button press. The software interface guides you through selecting devices and adding specific commands.
Remember to test your macro thoroughly after creation to ensure all steps execute correctly. The manual provides troubleshooting tips if a macro isn’t functioning as expected, offering solutions for command timing and device compatibility.
RF Blaster Functionality (if applicable)
The Harmony 650, depending on the specific model, may include RF (Radio Frequency) blaster functionality. The user manual clarifies if your version possesses this capability, enabling control of devices hidden from direct line-of-sight.
Unlike infrared (IR), RF signals can penetrate cabinets and walls, controlling devices without needing a clear path. If equipped, the manual details how to configure the RF blaster within the Harmony software, specifying which devices should utilize this method.
Proper setup ensures reliable control even for components housed in enclosed spaces, expanding the remote’s reach and convenience. Consult the manual for optimal placement of the RF blaster for maximum effectiveness.
Integrating with Smart Home Devices
The Harmony 650’s integration with smart home devices is limited compared to newer Harmony models, but some connectivity is possible through the Harmony software. The user manual details compatible platforms and setup procedures;
While direct control of all smart home ecosystems isn’t guaranteed, the Harmony 650 can often manage devices through hubs like Logitech Pop (discontinued, but potentially still functional for existing users). The manual explains how to add these hubs and configure commands.
Basic functions like turning smart lights on/off or controlling smart blinds might be achievable, enhancing the remote’s versatility within a connected home environment. Check the manual for specific device compatibility.